When user add any file which is Password Protected or Read Only in the Revision, It gives Protected Mode disable button
To fix it, please follow the guidelines:
- For Password Protected File:
If the file having password protected then remove its password first and then add the file.
To remove the password please follow below steps:
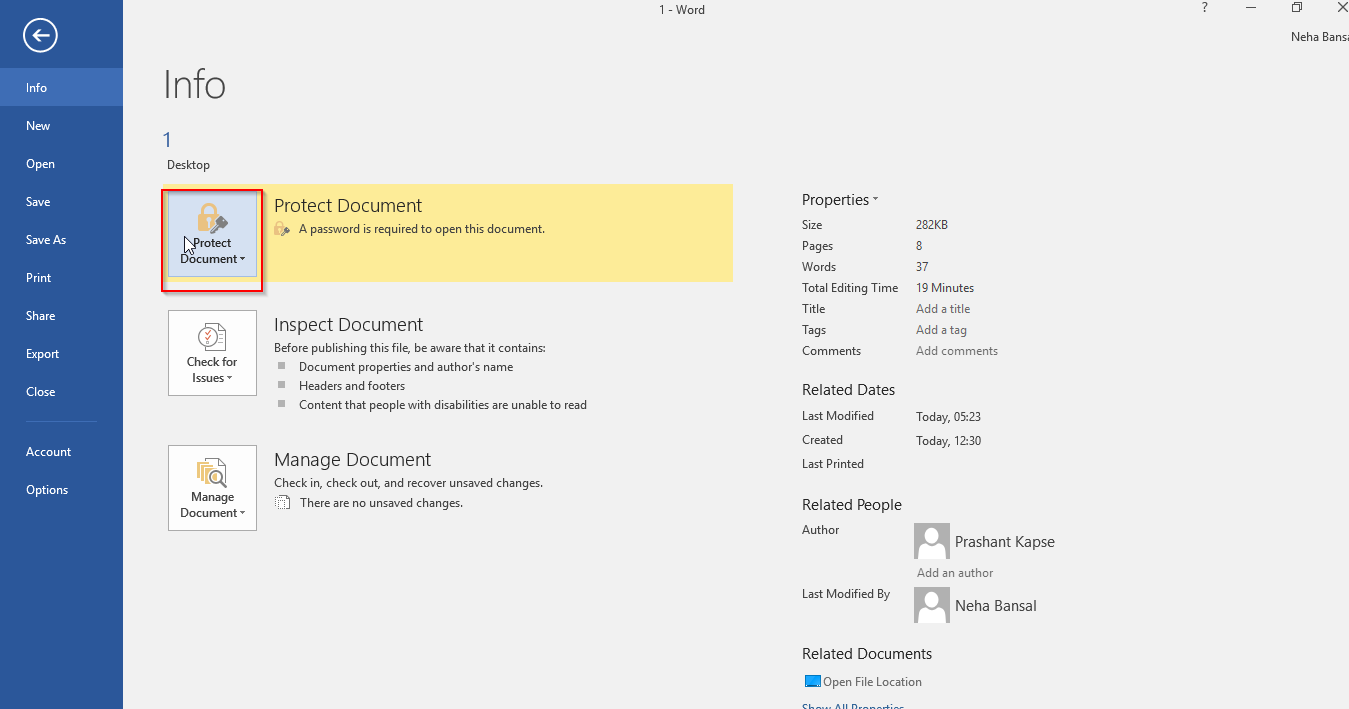
- Go to File> Info> Click on Protect Document Option.
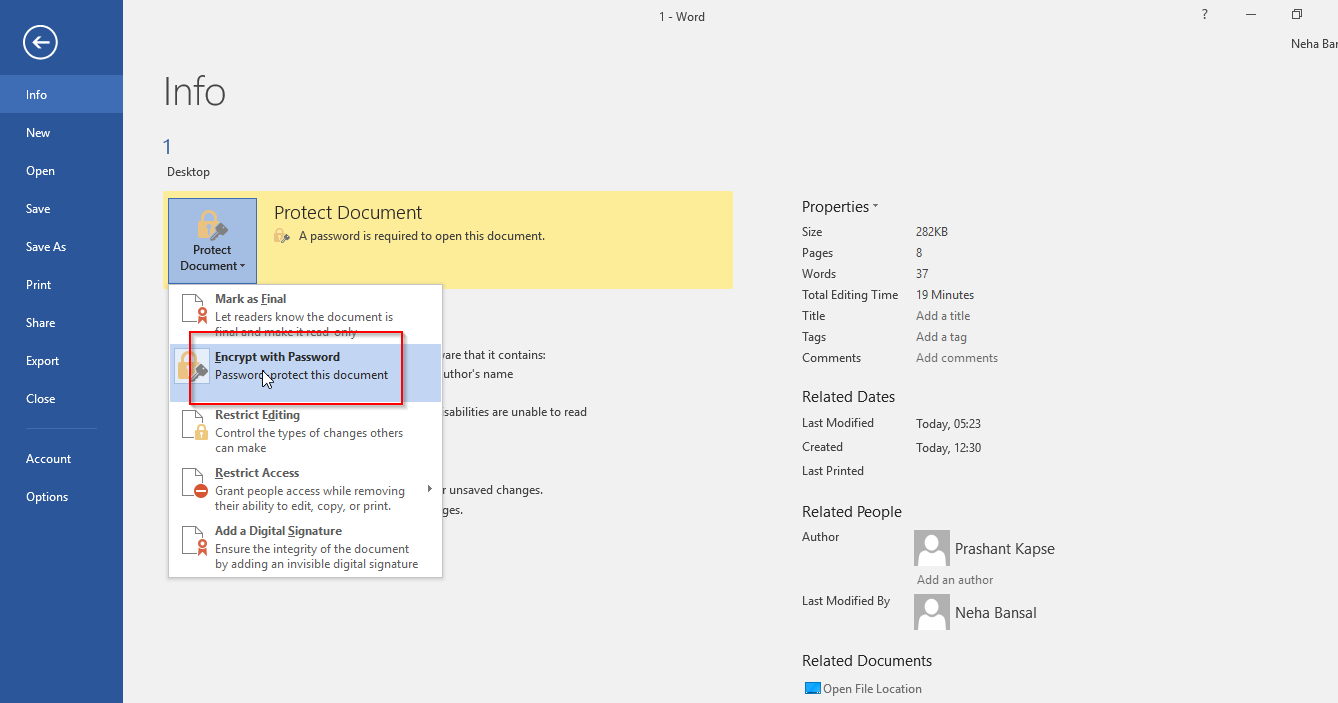
- Click on Encrypt with Password Option
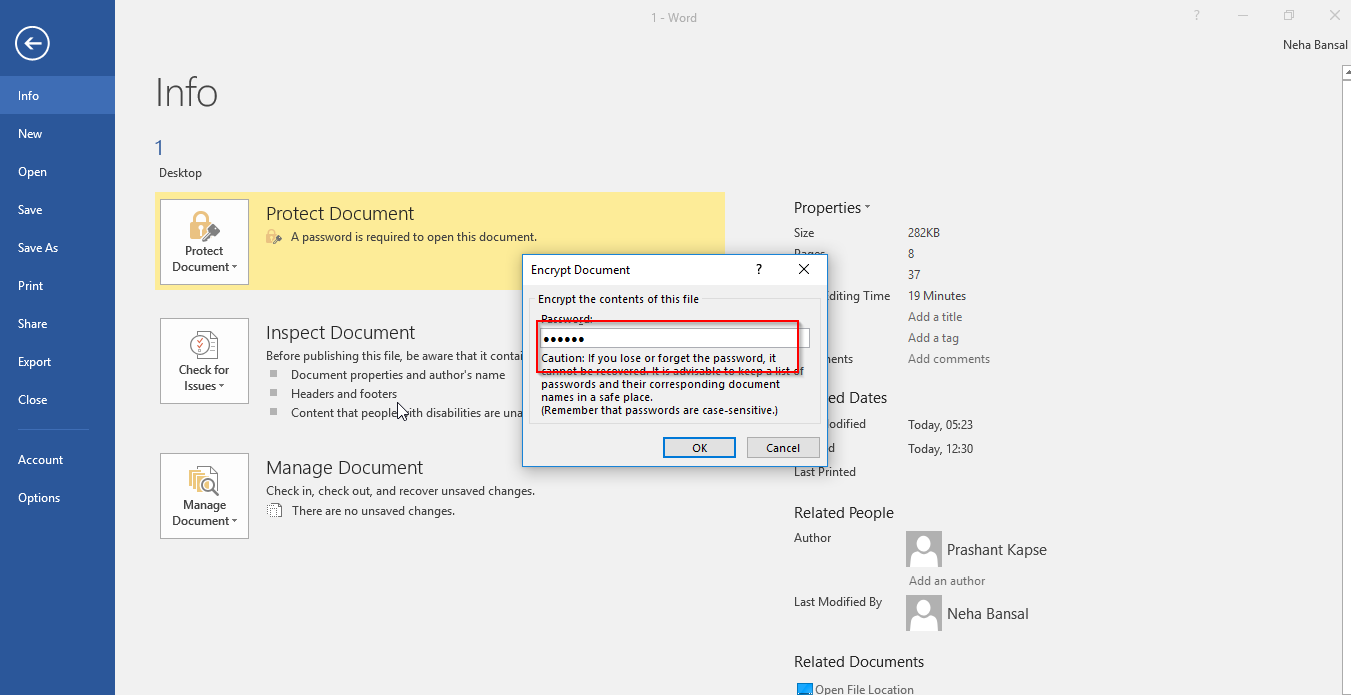
- In the Password popup, remove the existing password and click on Ok. And save the file now.
- For Read Only File:
If the file is in read only form then make it editable first and then add the file.
To make the file editable please follow below steps:
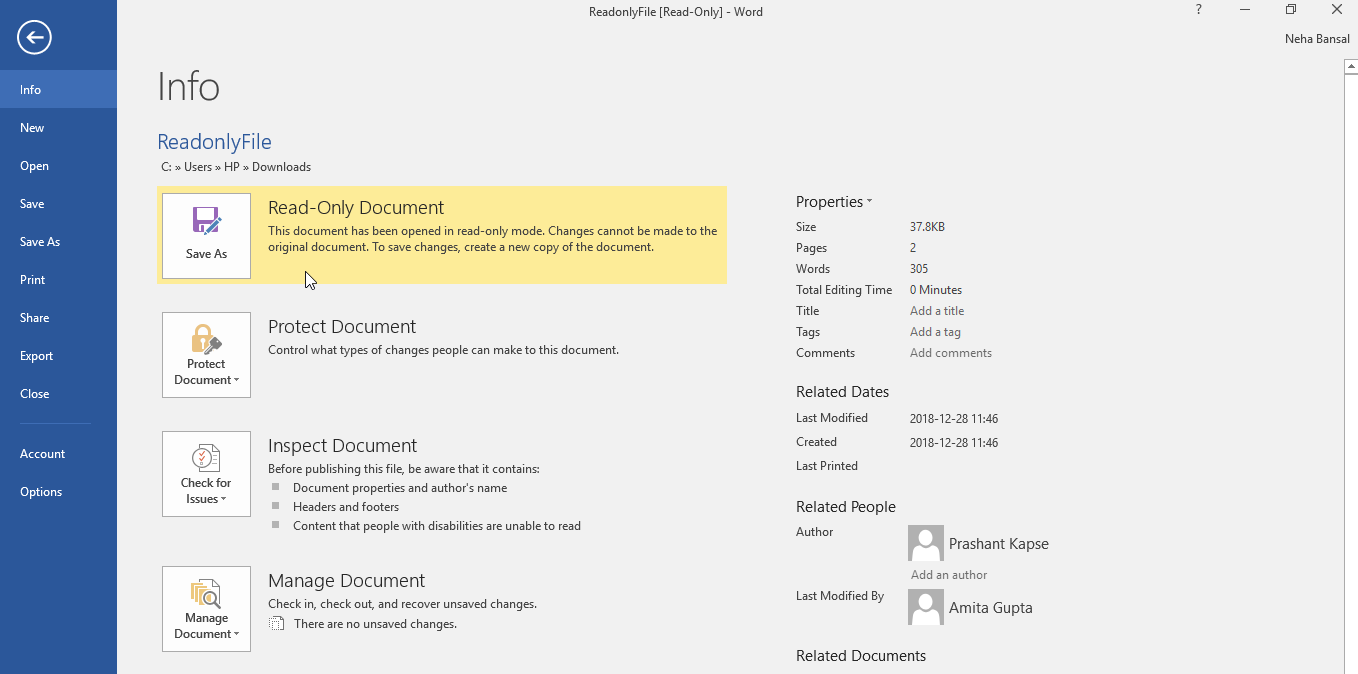
- Go to File> Info> Click on Save As Icon in Read only Document section.
- On Save As window, select General Options in Tools

- In next popup uncheck Read-only recommended option
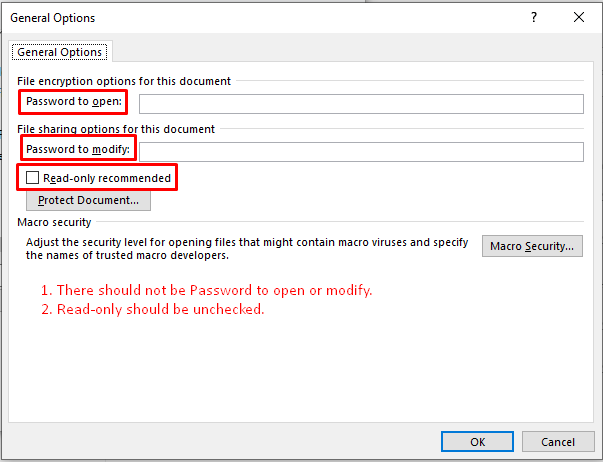
- Also, make sure there is no Password to open or modify the document on the same popup.
- Save the document.
To remove the Restrict Editing with a read-only mode, follow these steps.
- Go to File Menu>Info> Click on Protect Document > Click Restrict Editing

- In the following screen, The Restrict Editing panel will be visible on the right side of the document.
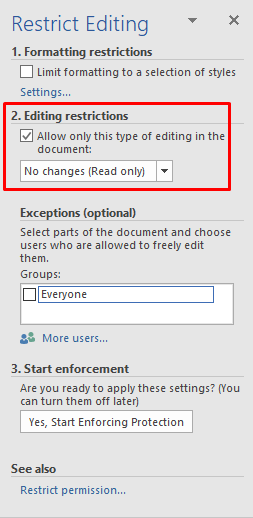
- Either uncheck the checked checkbox for the Editing restriction or select any other option (other than No Changes (Read only)) from the selection box next to it.
- Save As the file.
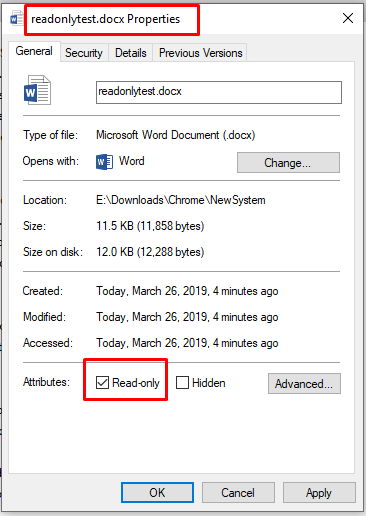
Also check the File properties that it Read Only checkbox in Attributes field, should not be checked.
- For Macro Enabled Files:
If the file is Macro Enabled then remove its Macro first and then add the file.
To remove the Macro please follow below steps:
- Click on Enable Content

- Click on View menu in Menu bar and select Macro
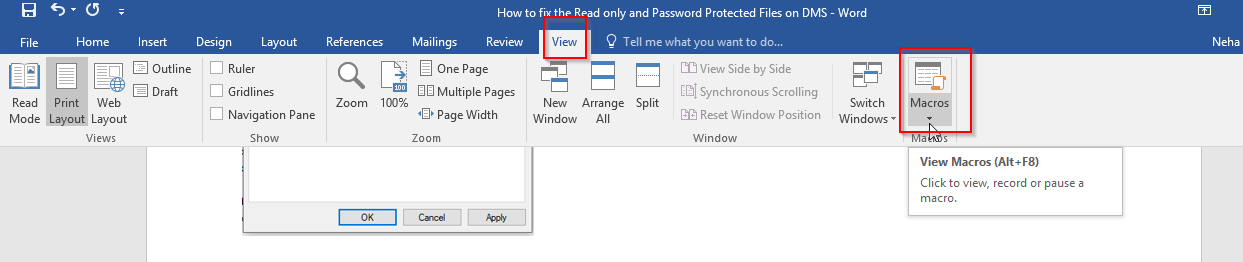
- Select View Macros Option

- On the Macro popup window, select Marco and delete that.

- Now Go to File> Info> Convert

- Save as the file now, it will display a popup. Click on Yes
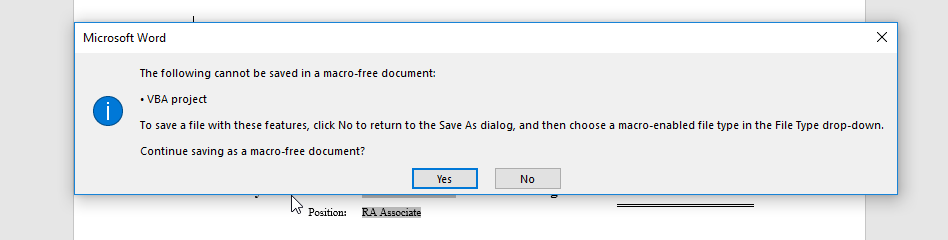
Now, file will be saved in Macro Free document.
You can use it now for signing the file.