OVERVIEW
Users with admin access in Orcanos have the ability to create new projects. These projects can be assigned to specific groups and individual users.
HOW TO CREATE A NEW PROJECT
To create a Project in Orcanos, a user has to follow the simple steps mentioned below:
- Select Projects in Projects & Solutions under Admin. A list of Projects and Solutions is displayed.
- Click on the Add icon on the bottom right side corner of the page.
- Project details Page is displayed with the following fields:
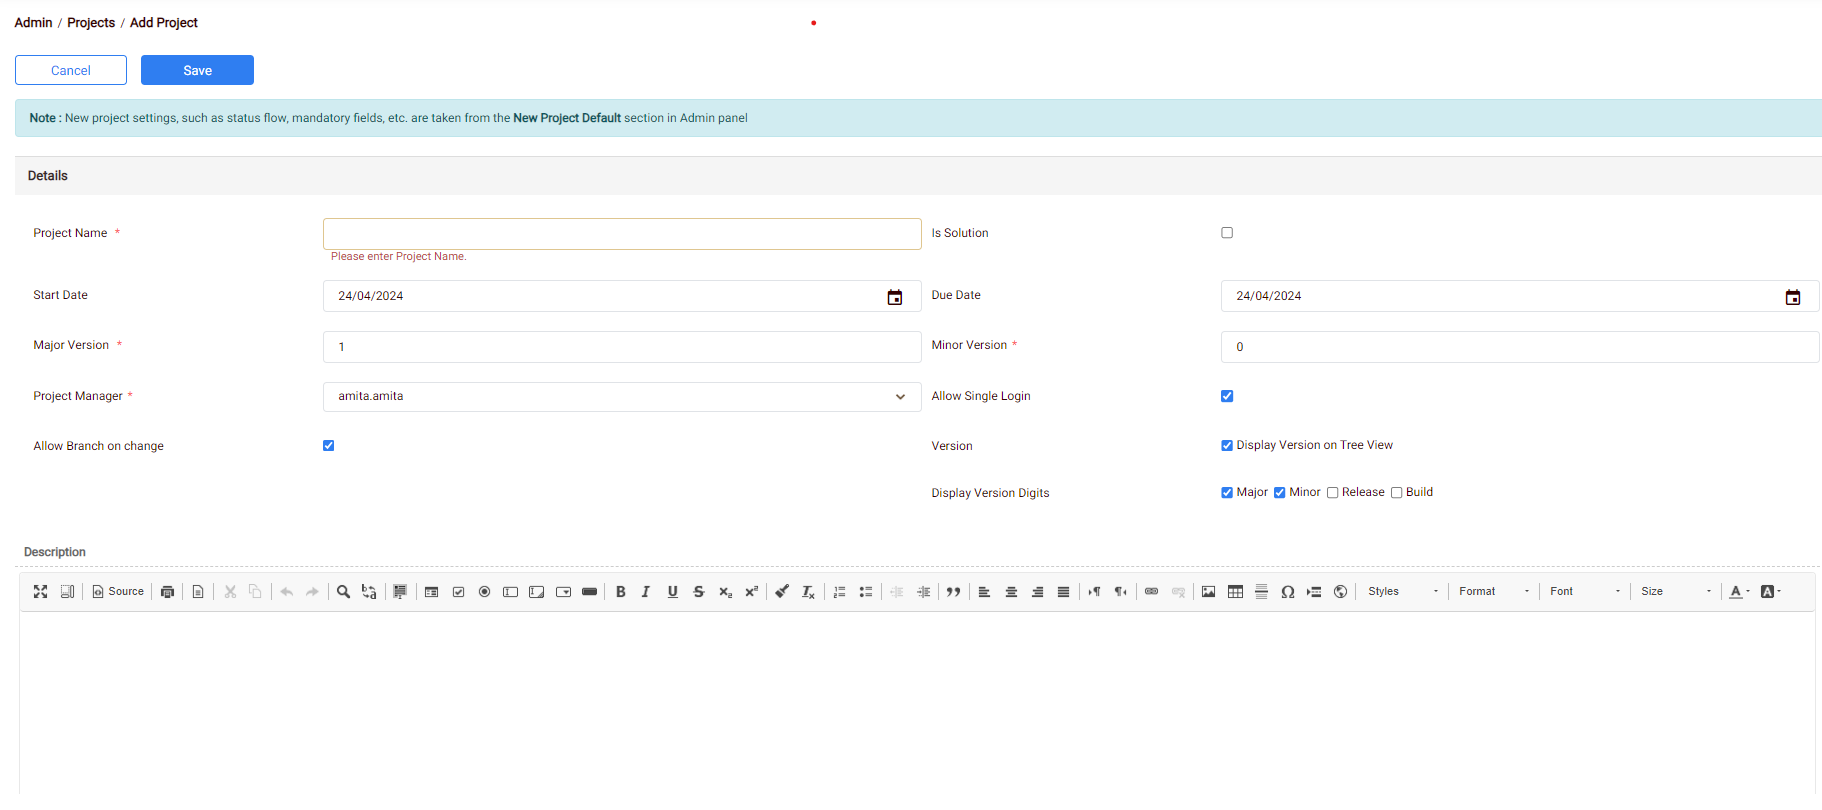
- Project Name: Enter the Name of the Project in the Project Name field.
- Is Solution: By Default, Is Solution checkbox should be unchecked.
- Start Date: Select the Start Date from the date picker (Calendar).
- Due Date: Select the Due Date from the date picker (Calendar).
- Major Version: Enter the Major Version of the Project in the Major Version field.
- Minor Version: Enter the minor version of the Project in the Minor Version field.
- Project Manager: Select the corresponding Project Manager from the Project Manager drop down list.
- Allow Single Login: When this checkbox is checked users can login to this project while selecting it from the projects selection dropdown in product tree / work item view.
When this option is not checked, users will not be able to login to this project through selecting it from the projects dropdown – In that case the project will only be seen as part of a solution, if added into any solution.
- Allow Branch on Change: To allow branch on change, check the Allow Branch on Change checkbox. If a project has more than 1 version then the user can branch the lower version item to a higher version.
- Version: This option displays the version number on items in the product tree. By Default, option is checked, user can uncheck it.
- Display Version Digits: Its displayed only when User can select the required check boxes in the field.
- Major – Displays the major version aside the project name. By default, it’s selected.
- Minor – Displays the minor version aside the project name. By default, it’s selected.
- Release – Displays the release version aside the project name.
- Build – Displays the build number aside the project name.
For Existing Projects with more than one version, Display Version on Tree View checkbox is checked and cannot be unchecked.
- Description: User can input the Project details and its description in this field.
- Save: Clicking on Save button creates the Project.