OVERVIEW
This article provides guidance on rearranging user groups within Orcanos. A well-structured and manageable collection of user groups ensures streamlined and efficient user and project management within the Orcanos platform
CREATE GROUPS
- Select the Groups in Admin under Users & Groups Section.
- Click on the Add Button icon. The Add Group popup window is displayed with the Name Field.
- Enter the name of the group in the Name field.
- Click on Save Button.
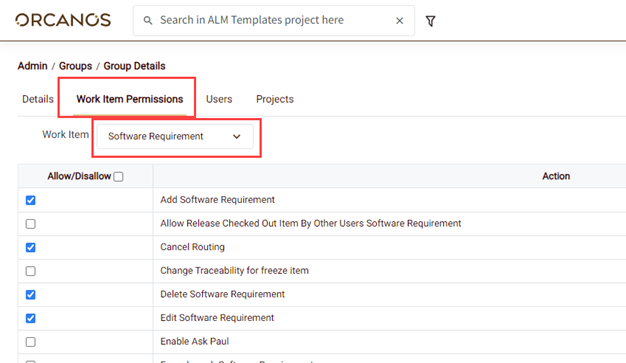
WORK ITEM PERMISSIONS TAB
It defines permissions for each work item type.
- Select the required work item from the work item type dropdown list.
- The list of permissions for the selected work item is displayed with Allow/Disallow checkbox.
- Check the Allow checkbox corresponding to each required permission
- The Permissions common for all work item types are listed under General(the first option in the work item selection list)
- Permission Selections common for all work item types:
- Change all to Read only: Unselect all the checkboxes for all work item types
- Change all to Read and write: Select all the checkboxes for all work item types
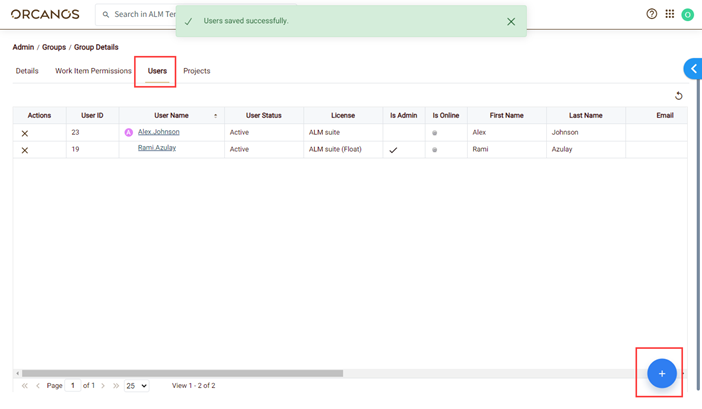
USERS TAB
The Users tab lists all the users related to the Group. Admin can add Users using the Add Users Button icon.
SWITCH GROUP FROM WHICH A USER ENTERS A PROJECT
We can reorganize the groups through which users access a particular project. We’ll proceed by reviewing each user individually and implementing the following method to update the user groups associated with project access.
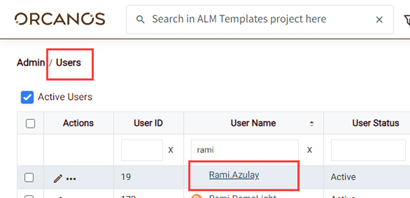
- Select the Users in Admin under Users & Groups Section.
- Select the required user from the list by clicking on User Name hyperlink
- Select the Projects tab
- Select all the Projects you wish to change their entry group
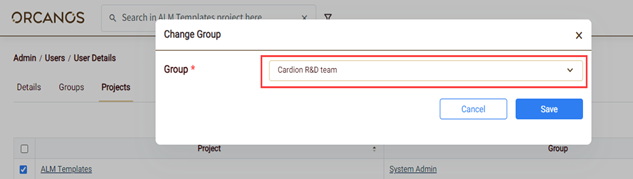
- Click on Change Group option from the menu icon.
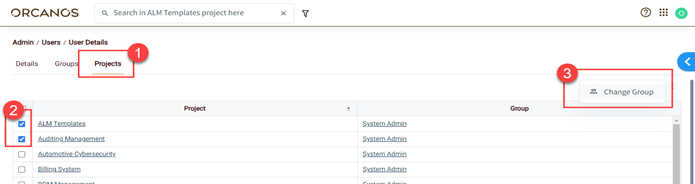
- On the Change Group pop-up, select the new group that will replace the old one and click on Save.
REMOVE UNUSED GROUPS
Since We’ve organized both groups and users, it allows us to remove any redundant groups.
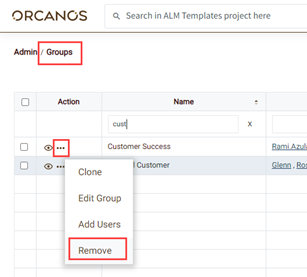
- Select Groups from Admin > Users & Groups
- Click on Remove option from the 3 dots icon in the Actions Column
If a group contains users that are connected with this group to a project, it may not be removed
In such case we need to remove users from the group first
- Click on View icon corresponding to the Group
- Select the Users Tab
- Click on Remove Icon in the Actions Column to remove the user from the specific group