We have a utility to import only Test cases and their steps, called the Orcanos Migrator Tool.
STEPS TO DOWNLOAD AND INSTALL THE TOOL
- Email [email protected] to get the latest setup of the Orcanos Migrator Tool.
- Download the setup and extract it to your local PC.
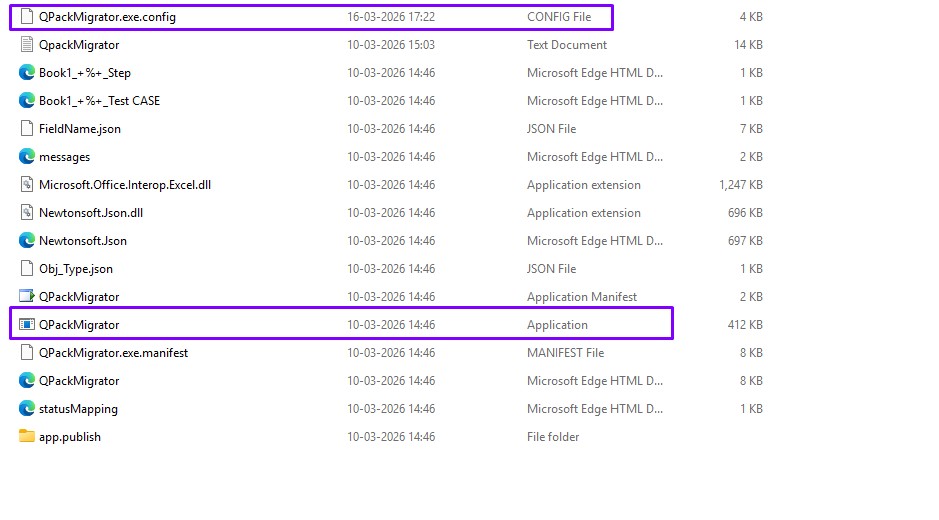
- Open the QPackMigrator.exe.config in Notepad++
- Search “endpoint address” tag in the config file as shown below.
<client> <endpoint address=”https://alm.orcanos.com/Orcanos/qpackserv/qpackserv.asmx” binding=”basicHttpBinding” bindingConfiguration=”QPackServSoap1″ contract=”Qpackserv.QPackServSoap” name=”QPackSrv1″ /> </client> - Change endpoint address to your account name –
The account name appears in the URL. For example, if you are at the hom
For US clients: https://us.orcanos.com/[account_name]/web/….
For all other clients: https://app.orcanos.com/[account_name]/web/…
e.g. https://app.orcanos.com/[account_name]/qpackserv/qpackserv.asmx - Run QPackMigrator.exe to start importing the Test cases with their steps using CSV/Excel file.
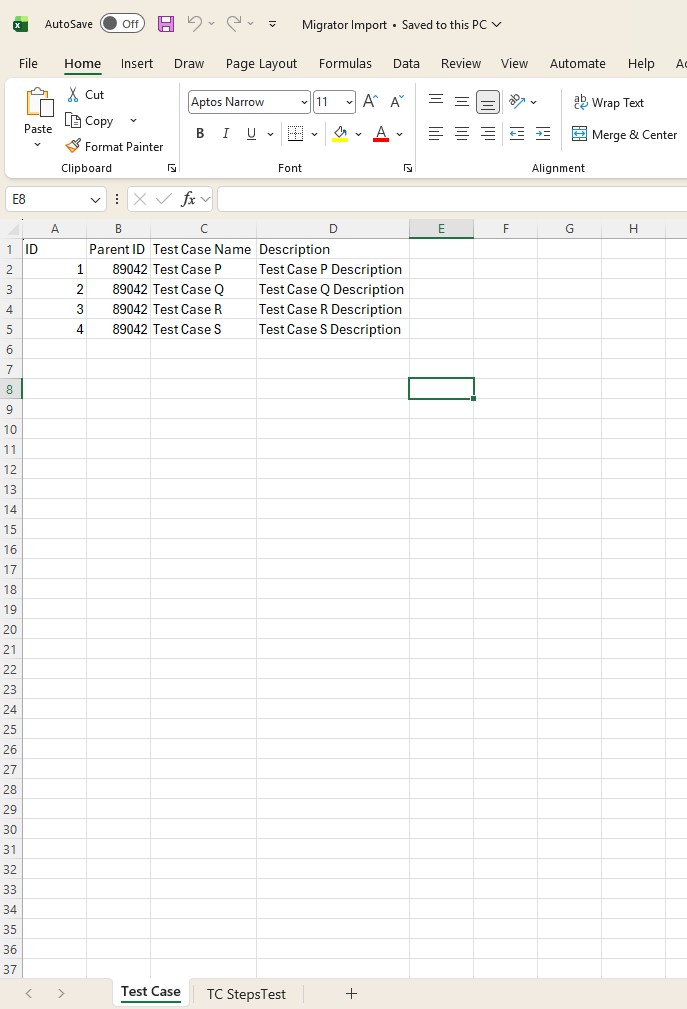
HOW TO CREATE A CSV/EXCEL FILE
Create a CSV/Excel file with the Following columns and recommended to create two sheets one for Test Cases and another one for Test Cases Steps as shown below for reference:
STEPS TO IMPORT TEST CASES
-
- Right click on the QPackMigrator application exe and run as administrator.
- Login to Orcanos Migrator by entering your credential and click ‘Next’.
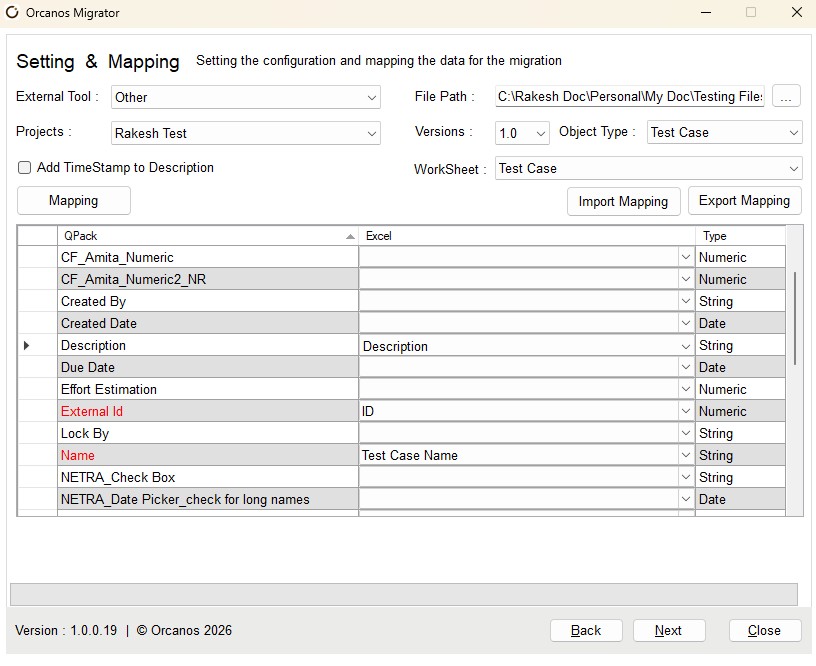
- Select ‘Other’ from the dropdown of External Tool
- Browse the file and its path should be displayed in File Path
- Select the Projects from the dropdown list
- Select the Versions corresponding to the selected project
- Select the Object type as Test Case
- Uncheck the checkbox – Add Timestamp to Description (To add the import timestamp in the test case or step description, check the checkbox)
- Select the WorkSheet of the browsed file from where to import the test cases
- Click the Mapping button
- Map the External ID
- Map the Parent ID (Parent Node in Orcanos Product tree where you want to add the test cases)
- Map the Name (Mandatory Field)
- Map the other mandatory fields, if any
- Click the Export Mapping button that will export the mapping in seperate file and keep it for future reference in the migrator system itself.
- Click the Import Mapping button if you want to use the same mapping in the future for next time.
- Click the Next Button (Select some other cell in grid to enable the Next button)
- Browse the same file again and its path should be displayed in File Path
- Select the WorkSheet of the browsed file from where to import the test cases steps
- Click the Mapping button
- Map the Order
- Map the Step Description
- Map the Step Expected Result
- Map the Test Id
- Press Next Button (Select some other cell in grid to enable the Next button)
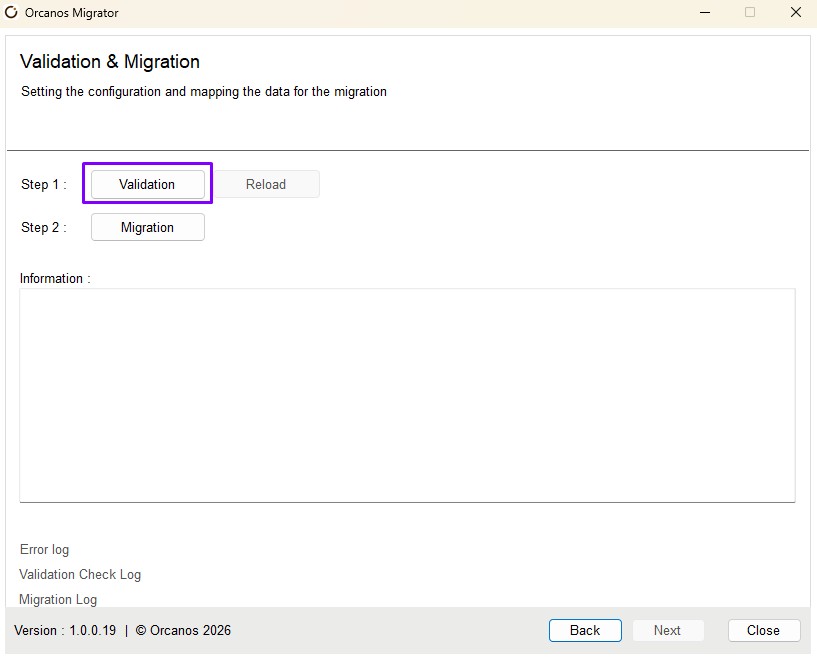
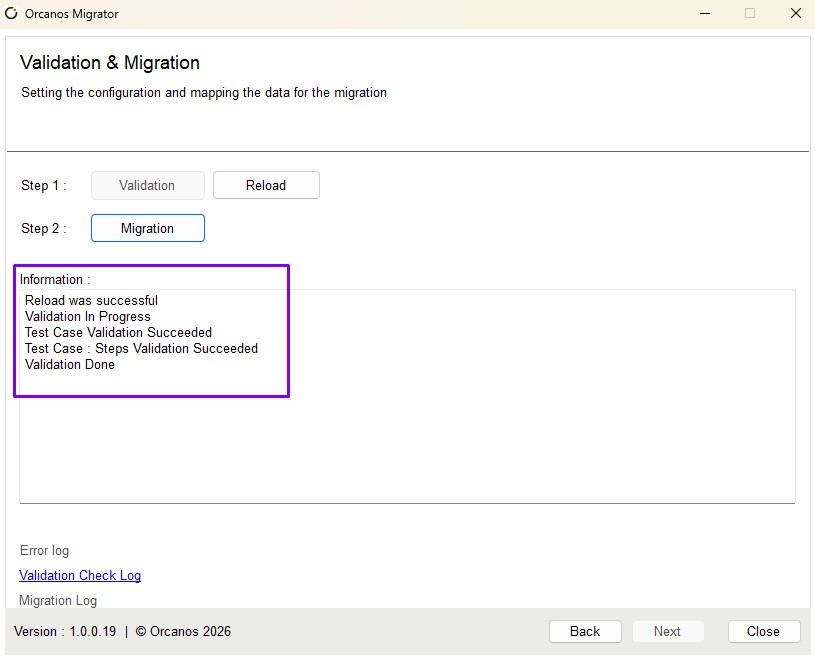
- Click the Validation Button as shown in the above image.
- Click the Migration Button. All test cases with steps migrated into the application and displayed the ‘migration successful’ message as shown below:
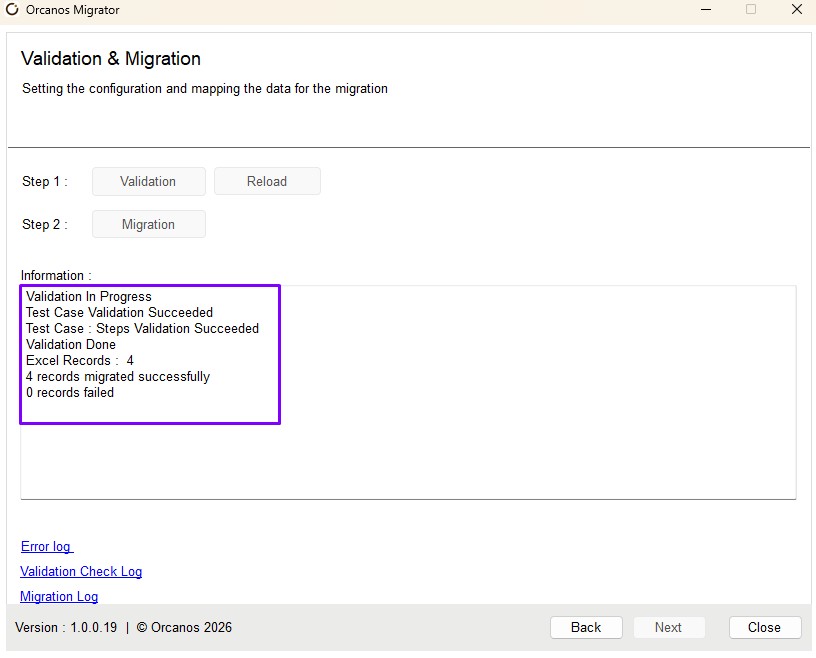
The Test cases with test steps get imported to the Orcanos System.