OVERVIEW
Users can Start the Routing Process for multiple DMS Items and sign the multiple DMS items
TO START ROUTING PROCESS FOR MULTIPLE DMS ITEMs
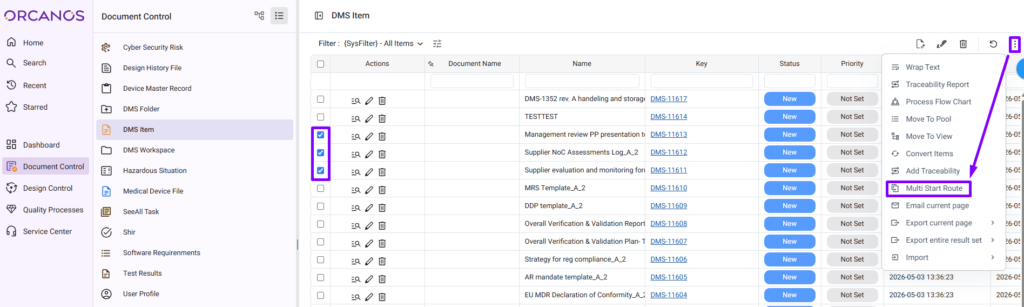
- Select Document Control from the sidebar and click the List View icon.
- Selects the DMS Item work item type from the left side pane.
- In the work item grid, select the DMS items you want to start routing, click on the ‘More actions’ (3-dots) icon, and select the ‘Multi Start Route’ option.
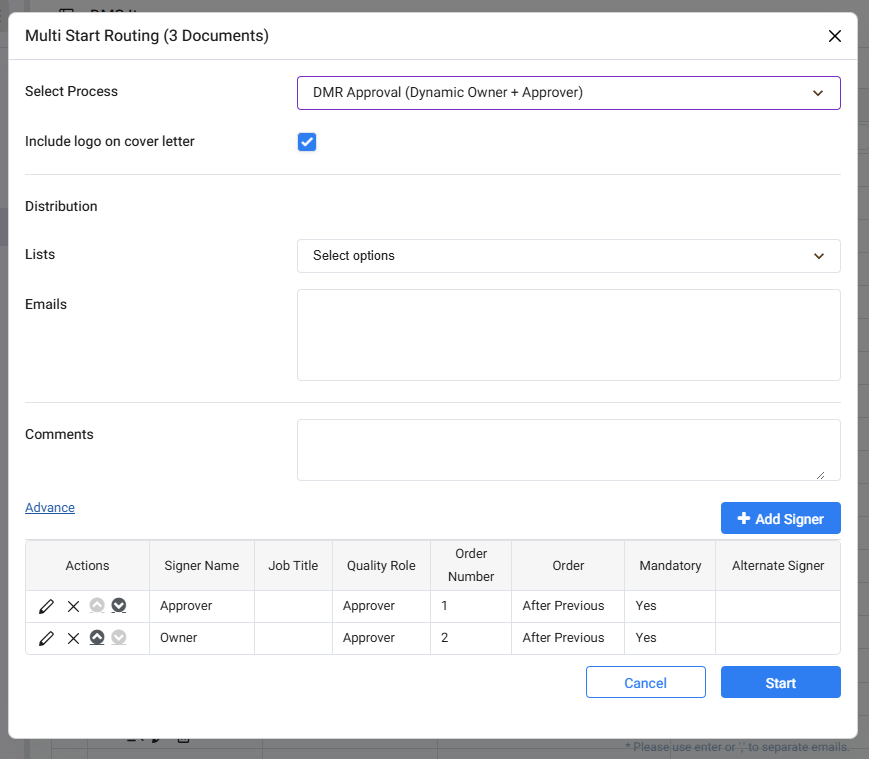
- The Routing Details Page gets displayed
- Select Process – Select the Routing Process.
- Include Logo – Checkbox to logo in the Download PDF generated, if any.
- Comments – Input comments during start routing, if any.
The ‘Start’ Button gets enabled only when user select the DMS Items in the Grid. Routing Process can be started for maximum 100 DMS Items
- Click on the Start button.
Make sure, DMS items have the Revision file to select the checkbox, otherwise, the row is grayed out and checkbox would appear disabled
TO SIGN MULTIPLE DMS ITEMs
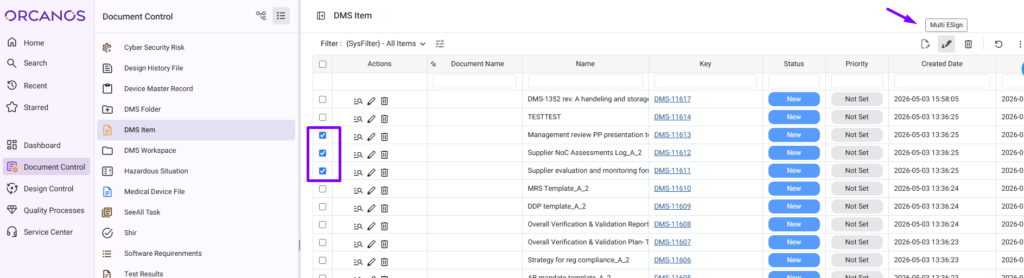
- Select Document Control from the sidebar and click the List View icon.
- Selects the DMS Item work item type from the left side pane.
- In the work item grid, select the DMS items you want to sign (their routing state should be ‘In Work’), click on the ‘Multi Esign’ icon.
- A pop-up window appears, select Ok to start the signing process.
- The sign document screen opens in a new tab. The status of the signed items changes.